Monday, September 27, 2010

101 Things to do with Apples


When I graduated from college in 2003 we were still very close to 9/11. In fact it was just a few months earlier that we invaded Iraq and President Bush (with still somewhat popular ratings) had made a national call to service. He challenged youth to serve their nation in whatever way felt compelling to them. I, with no idea what to do next with my life, answered. I applied for AmeriCorps and was placed in the National Civilian Community Corps for a period of 10 months which is how I first came to know Washington, DC.


NCCC is a team-based, residential program that serves 5 key areas: Education, Environment, Public Safety, and Disaster Relief and.......We trained for a month on a campus in Anacostia and then were placed on teams of 9 or 10 people, according to our skills. My team and I fell in love with one another. We bickered, we argued, we beat one another up, and we fell asleep snuggling. We traveled in a stinky 12 passenger van all over the east coast serving in project after project. Our very first “spike” (as travel projects were called) was in West Virginia building a walking trail and educating West Virginia’s most obese county (Putnam) on health and wellness. I totally understood why this county would have a high obesity rating. They had Tudor’s Biscuit World.

Oh dear, how I miss it. Tudor’s is a fast food chain that sells BISCUITS. Honestly, before that fateful day in October 2003, I had never had a biscuit. My family never made them. So, like Hansel and Gretel in a gingerbread house, I dove in. We all did. Here we are: 10 of us generally thin and fit people educating the masses about making healthy food choices while secretly gorging on all the things that contribute to obesity in the first place. Principle among the fattening agents: biscuits and apple butter. I must have gained 6 pounds on that spike.

I’ve not been back to Tudor’s since then, but this fall, due to an amazing find of a Foley Food mill for TWO BUCKS in a thrift store, I decided to revisit what was once an obsession. I mean, I’ve grown up, right? I know how to restrain myself, right?
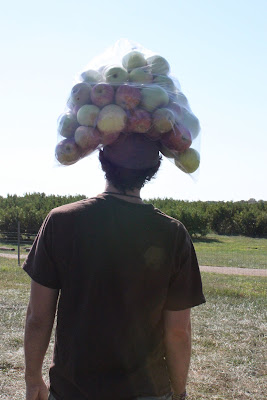
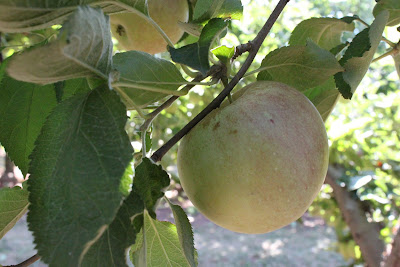
The first step to making apple butter is to make applesauce. We went back to Homestead Farms to pick a ridiculous amount of apples. There is something very childlike and innocent about applesauce. Unadorned and sweetened little, its mother nature’s most soothing carbohydrate. At the bottom of this entry you'll find the necessary instructions for making applesauce and applebutter. But first I'd like to get on a soapbox about why this is a worthwhile venture. I have a few reasons.


Reason #1: Applesauce is a family-friendly recipe. First, you can teach your child about canning. Which teaches them about following instructions. And also teaches them about a heritage. Which brings you family members together in a kitchen. And allows you to relive fun family memories when you pull jars out of the cabinet months later. And, your child begins a process of recognizing where food comes from. Hopefully they'll wonder the same thing about Doritos someday down the road....
Reason #2: its economical. 30 pounds of apples is basically all it takes as long as you've invested in the jars. We got about 15 pint jars of apple sauce or butter out of $1.49 a pound apples. See how much it costs to purchase 15 jars of boutique organic apple butter at a store.

Reason #3: it planet-friendly. Seriously. Aside from replacing lids every year, the jars are filled, used, washed and re-used next year. There is no waste. That is a priceless investment.


So, to make applesauce (and then applebutter):

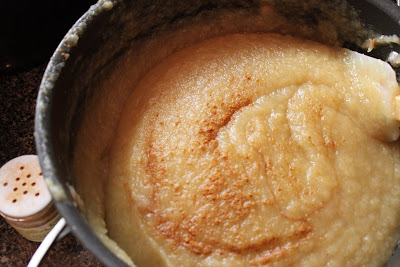
As always, wash jars, lids and rings in high heat and dry thoroughly. Keep your jars warm for the applesauce. I started by peeling my apples because I wasn't completely confident in Homestead's organic rating although technically you don't have to peel your apples. The peels will get worked out in the food mill. So peel, core and cut apples into chunks and put in a big kettle on the stove (5-8 quarts). We needed two 8 quart kettles. To each kettle add about 3/4 cup water and 1/4 cup white or cider vinegar. Let them simmer until really soft and mushy, at least for an hour. When you think they won't get any mushier, set your food mill up over a bowl and push the apples through.


At this stage of the game, you're essentially done. I didn't add any sugar, but I did add about 2 teaspoons of cinnamon. Half of the applesauce went into jars and the other half went into a slow cooker where I added a half cup of brown sugar, half cup white sugar, and two more teaspoons of cinnamon (to about 10 cups of sapplesauce). Then I set the slow cooker on medium for eight hours. One recipe suggested 5, another said 12. By 7 hours I thought it had reached a nice shade of brown. Truth be told, the applebutter could have used more sugar. But I couldn't bring myself to do it.
The applesauce was processed right at the time it was jarred for 15 minutes. The applebutter also got 15 minutes submerged in the canner in boiling water. HOWEVER, applebutter and applesauce freeze really, really well. So if you have room in the freezer, skip the whole canning thing.

We also made apple pie that night. But by 2:00am, I wasn't churning out the best pies in the world. Another story, another day.

So the moral of today's posting is: hit the orchard. Take your family. Create a tradition and teach your kids to be mindful of where their food is coming from. Those experiences truly made me who I am today and I wouldn't trade any of it for a $3.49 jar of grocery store applesauce.

Monday, September 20, 2010

Exercise your voting rights

Hi all! Today is the actual start of the food blogger COMPETITION! Voting opens at noon EST, so don't forget to click on the link to my profile on the right of this page and VOTE FOR ME! You'll have to create an account with Foodbuzz if you don't already have one, but you'll appreciate that you did for joining such a warm, spirited and open community is most definately worth your time.

If I make it to the next round I'll need your help and suggestions for making a dish from a more exotic cuisine. What's the most exotic dish from another culture that you've ever had?

xoxo,
Jillian

Thursday, September 16, 2010

"I Wanna Live with a Cinnamon Girrrl"...


So sings Neil Young. Listen to Neil. He knows best.

When you turn 21, most kids get things like savings bonds. Or liquor. Or their first suit. Me? I got expensive cinnamon and a professional 9x13 pan for cinnamon rolls. And a shot of Luksusowa vodka, of course. In our Polish farm family, that meant "I confer upon you the responsibilities of a head-of-household woman. Go forth, have many babies, fatten them on cinnamon rolls". Well 8 years later, still no babies. But someday when they arrive, I'll be ready for them.

I hadn't made cinnamon buns in awhile, but two things prompted me to hop to it. First, Eric begged. Second, Aunt Linda gifted me with some King Arthur SAF Red Instant yeast and I wanted to take it for a spin. I wish I'd taken a photo of the sponge because HOLY MAN the yeast was a MONSTER. I was afraid that if I stuck my hand in the bowl, it would eat off my fingertips. After a lifetime of Fleishmanns in the packet, this changed my world.

Look at that happy dough! It was smooth as a baby's bottom and very elastic. I used King Arthur Flour too. I think we can safely say that I'm a snooty King Arthur convert now.


Fun fact: did you know that the majority of the cinnamon available in the US is not actually real cinnamon? If you go to the supermarket and purchase a bottle of "cinnamon", its most likely cassia, a cousin of cinnamon with a stronger flavor and much broader geographic region of cultivation. Basically, its more plentiful and therefore cheaper. True Cinnamon is generally marked as Ceylon Cinnamon, (name for the place of its origin in Sri Lanka). It's sweeter and milder. Read more about the history of cinnamon/cassia here. You can find Ceylon Cinnamon in the US through Penzey's but honestly, you might find it boring and mild since our American taste-buds are used to the strong flavor of cassia. I use Penzey's Vietnamese "cinnamon", a kick-butt potent and fragrant spice.

I'll get to the recipe below, but check out the method for cutting the log of dough. Yes, that's dental floss. Be sure to get plain dental floss. Unless you like to freshen your breath while eating cinnamon buns.

This dough log is just ooooozing butter, sugar and cinnamon. Sometimes its hard to restrain your boyfriend from licking the end of the log.

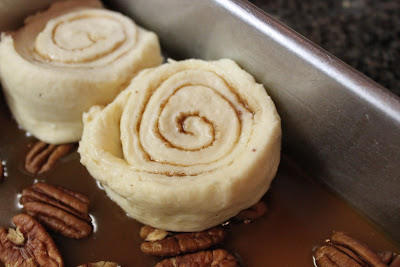
And here is where we reveal the secret waistline killer: pecan rolls. So the cinnamon roll dough makes either plain buns or pecan buns. The whole recipe generally fits into a 9x13 pan, so I separated it into two 8x8 pans for some variety.


These guys rise twice. Remember this when 9:30 p.m. on a Saturday night rolls around and you get the brilliant idea to make cinnamon buns, like I did. Don't plan on getting to bed until 2 am. The good news is that when they are through with their second rise, you can cover with plastic wrap and stick them in the fridge. If you stir from your slumber early the next morning, go take them out of the fridge and set them on the counter to come to room temperature and set the oven to pre-heat. Go back to bed for an hour (or more).


Parysek Family Cinnamon Rolls:

Recipe by my Grams

2 packages dry yeast (if you use a big canister of yeast, each packet holds 2 and 1/4 teaspoons) dissolved in 1/4 cup warm water (110 to 115 degrees)
2 cups milk
1 cup water
1 tsp salt
1/2 tsp nutmeg
1/2 cup Sugar plus 3 tablespoons
1/2 cup butter plus 2 tablespoons
1/4 cup "lard" (because my grandma often renders her own. You can use Crisco's with non-hydrogenated oil shortening if you don't have any pigs nearby. Some grocery stores will indeed carry lard, though).
3 eggs
About 7 cups white flour (it was a humid day, I needed an extra 3/4 cup)
Raisins or nuts (optional)
Cinnamon, as much as you like
Confectioner's sugar and milk if you want a glaze

Dissolve your yeast in water. If you want to make it grow, add 1/2 tsp of sugar to get a nice sponge. Set aside. Sift the flour into a large mixing bowl and set aside. In the bowl of a kitchen aid mixer (or just a large bowl) combine butter (does not have to be softened) sugar and lard. In a saucepan heat the milk and water until very warm but not boiling. Add nutmeg and salt to milk mixture. Stir and allow salt to dissolve, then pour the milk mixture into the butter/sugar/lard bowl mixing bowl. Stir and then let cool to at least 115 degrees. When cooled, add the yeast sponge and hook it up to your dough hook on your mixer. Add the eggs and flour alternatively, ending with flour when you have a cohesive, sticky mass.


Dump it onto a lightly floured work surface and knead until smooth (8-10 minutes). It should still be a little tacky and could absorb more flour, but you don't want to dry out the dough. Put it back in the mixing bowl and cover with a towel to let it rise in a warm place for at least an hour or until doubled. Check it often if you try the Super-Monster Yeast. Mine spilled over the top of the bowl within 40 mintues.

Roll it out flat on a floured work surface. Melt your extra 2-3 tablespoons of butter in the microwave and spread it over the dough. Sprinkle with 2-3 tablspoons sugar and as much cinnamon as you wish. This is a good time to add raisins or chopped nuts. Roll it up like a jelly roll. Use dental floss to cut it into about 2.5 inch slices and place them in a well-greased pan. Smoosh them in good and let rise a second time for at least an hour. Bake immedietly or refrigerate overnight.

My Grams says to bake at 375 for 30-35 minutes. That's too hot for my oven and they brown too quickly, so I stick with 350 for 35 to 40 min.


If you want to make the pecan rolls (and I'm pretty sure you do), melt 1/4 cup butter with 1/4 cup milk in a saucepan. Add 1 cup packed brown sugar and cook slowly for five minutes until simmering and thickened. Pour into the bottom of an already greased pan and sprinkle with whole or chopped pecans. Place the rolls on top of that and follow the rest of the steps by letting it rise a second time.

Those with wild sweet tooths can make a glaze out of confectioner's sugar and milk or soymilk to drizzle over the top of the sweet rolls. OMG YUM!

Monday, September 13, 2010

Giardiniera is for Lovers


I write this blog not because I love food, but because I love people. Sometimes with the fast pace of our modern and disconnected lifestyles, we forget to talk about what we are eating and why we choose to eat it. Food is powerful; the most powerful form of currency we’ve got. And when we share it and the unique traditions that we associate with our food, we’re forming and transforming and negotiating relationships. I would suspect that 99% of the talented people who participate in Foodbuzz and other food-related communities do so out of their love for sharing stories more than the actual food they write about. That’s what makes our meals, menus and stories so gosh-darn special.

Tales from the Fruit Cellar is unique because I always feature the people at the heart of the recipe and the relationships and heritages that are bound by what we perceive to be our individual food culture. I love to instigate a discourse about why we step into our kitchens in the first place and I hold myself responsible for acting as a virtual scribe to record the conversations. I'm eager to bring people back to a tradition-based food system, regardless of how the individual defines "tradition". I love to celebrate the fact that we all define tradition in myriad ways.

I generally power up my computer to write not because I’m so worked up about a recipe, but because I can’t wait to tell you about the people that have become inextricably linked with that recipe. Today, I’ve got a love story for you.


Eric and I met in 2008 on the island of St. John in the Caribbean. He was from Indianapolis, I from DC. We didn’t want anything to do with long distance. A few months later, we were heavy in the throes of a Long. Distance. Relationship. Sigh.


For those of you who would rather eat worms that get involved with someone who lives over 50 miles away, I’m here to tell you: long distance really isn’t all that terrible. When you’ve got a full and busy life, it’s actually quite nice to set aside chunks of time to spend 100% focused on one another. It’s exciting to fly back and forth and discover a new town you wouldn’t have found otherwise. Especially when that town has Goose the Market.

Eric and I fell in love over a sandwich. Seriously. You know how its way more enjoyable to eat a hot fudge sundae with someone who oohs and ahhs over it as loudly as you? Well foodies about the globe know what I mean when I say that falling in love with a person feels much more punch drunk when your time with that person is punctuated by fabulous food you’re equally smitten with. For us, that was the Batali sandwich. Oh my goodness…I can’t even write about it without feeling wispy nostalgia tear at my heart.

Goose the Market, in Indianapolis, is like a souk for the modern Midwest urban explorer. Filling a brightly colored store-front in a newly reclaimed part of the city, Goose opened in 2008 and knocked the pants right off the Indy food scene. Would you like to join a Bacon of the Month club? At Goose, you can. Need to find blue-ribbon local cheeses? They’ve got it. Hungry for gelato? Hit it up. But under no circumstances should you ever leave the market without a Batali.


A Batali is actually a simple sandwich, but the combination of flavors and the integrity of the meats make it outstanding. It's coppa, soppressata, capocolla, sharp provolone, tomato preserves, pickled red onion, hot giardiniera, mayo and lettuce on crusty bread.

So here we are: Eric and I, deep in that early intoxication phase of love, when he takes me to the newly opened Goose and we share a Batali. It was like our eyes were opened to what sandwiches were always meant to be. I'm entirely serious when I say it was a religious experience. We went back the next day for another Batali. I started picking them up on the way to the airport for my lunch in DC the next day (it NEVER made it to lunchtime). When Eric would eat one without me, I always knew it. My sixth-Batali sense would ring in my ears. He would admit to it, full of shame. I couldn't ever judge him. If I could, I'd eat them all the time as well.

The next thing you know it’s a once a month occurrence where I’m running to find my new love at the baggage claim at Reagan airport, giving him a quick kiss hello and saying “where’s my sandwich??” Tourists in DC would watch us, thinking that I must not eaten for days with the way I am ravenously tearing into a sandwich at baggage claim. Eric watches with a little frustration that I’m paying no attention to my freshly arrived boyfriend, but with a little pride too. “That’s my girl”, he thinks. “Can I have a bite?” he says. We share a greasy, spicy kiss and the Batali is gone in under 5 minutes.

Eric and I now live just two hours apart: he in school at VCU in Richmond, me still in DC. When he arrived in Richmond this past winter, I wrote a love letter to Goose, imploring them to share the secret of the Batali with me. Graciously, they shared their recipes and we attempted our first recreation of the Batali in Richmond. The issue is that while our recreation came out mostly alright, we used a jarred Giardiniera that seemed to have no spice or sass. I spent a few sleepless nights wondering what went wrong before deciding that the Giardiniera is what left our homemade Batali lacking. So we said "let's try again, but make the Giardiniera ourselves".

Like many of my recipes, this one is a classic, banal item that you probably buy in a jar at the grocery store. But the secret is that its unfailingly simple to make at home where you have more control over what you put in the jar. Use organics and quality vinegar or oil; I promise you’ll be glad you did. We used a lot of super extra hot peppers, again from Clagett Farm, and we tried both the oil method and the vinegar method to see which we preferred. The answer is: I like to mix a tablespoon out of the oil jar and a tablespoon out of the vinegar jar!


Hot Giardiniera

About 1.5 pounds mixed hot peppers (jalepenos are perfect, we used green chilies too)
2 red or green bell peppers cut into strips

3 stalks celery, sliced thinly

3 carrots, sliced thinly

2 cups cauliflower cut into mini florets

1 whole garlic clove for each jar (cleaned)

1 cup good quality green olives, sliced (we used garlic marinated ones off the olive bar at Whole Foods)

1/2 cup kosher canning salt

1 tablespoon dried oregano

1 teaspoon pepper corns

1/2 tablespoon hot pepper flakes

1/2 teaspoon fennel seeds

Olive oil for your oil-packed jars

White distilled vinegar and sugar for your vinegar jars


Cut all of the veggies to the size and shape you prefer. I left the seeds in half of the peppers since we like them hot. Toss all of the cut veggies in a large bowl with the kosher salt EXCEPT the olives. Add enough water to just cover the veggies. Cover and let sit in the salt bath in the fridge overnight or for at least 12 hours.

The next day drain and rinse really, really well. I irrigated the whole bowl for a good 30 minutes, swishing and draining in fresh water. Let drain well.

Toss the veggies with the olives and the oregano, hot pepper flakes, fennel seeds and peppercorns. Drop a whole garlic clove into the bottom of each jar and pack the jars with veggies. Cover with olive oil and give it a lid.


If you prefer to use vinegar, simmer 1 cup white vinegar with 1/4 cup sugar. When all dissolved, pour the hot vinegar over the veggies in the jar. Some recipes claim you can mix the vinegar and oil but it seems the vinegar and oil separates anyways.

I didn't process the Giardineira, so it's got to be kept in the fridge. However, you can process the vinegar ones for 15 minutes in a canner and give away very colorful holiday gifts.


We haven't re-made the sandwiches yet, but I'm gearing up to make the onions and tomato preserves. Undoubtedly, the act of making a Batali will make me think fondly of my now-seasoned relationship and our first sparks of love. When you think back to your favorite recipe, who are the people that make it special for you?

Thursday, September 9, 2010

California, Part 1


Julia Pfeiffer-Burns State Park


I'm laughing because I'll begin this post the same exact way as Not Derby Pie; we obviously had a similar summer vacation!

I had a conference in San Francisco and Eric tagged along for a birthday trek. I've always wanted to go to Big Sur for the majesty of it all, so we touched down on a Saturday and got right into a rented jeep and drove down Highway 1.
Bonnie 'Prince' Billy was our soundtrack and it was perfect!

Our plan was to stop at the famous Nepenthe for dinner, but cars lined the street a mile down and the reviews all say that you should go to Nepenthe for the view, not the food. "Meh" food didn't resonate with us, so we went to Deetjen's, attached to the famous Big Sur Inn just a few miles down the road instead. It was 7:30 in the evening, but our east-coast-time-zone stomachs that had survived two Cliff bars, a bag of peanuts, half an airport sandwich and 3 apples wanted DINNER. And dinner we got. We both agreed that it might have been the fresh mountain air or the giddiness of being somewhere new or our super exciting celebrity siting- Zooey Deschanel in the empty parking lot- For real! Whatever it was, Deetjen's was our most favorite meal of the trip. (and it was a gift from my dad. THANKS DAD!)


We both had a glass of local cab, and the roasted tomato basil soup. They served a delicious tapenade with their bread. Then Eric had a seafood pasta with clams, mussels and shrimp, capers and a saffron cream sauce that had a certain umami about it that I can't replicate. I had a filet (!) with sea-salted green beans and a smashed potato cake. We practically licked our plates and agreed that one of the best parts of the decidedly upscale meal was that we were wearing sneakers and cargo pants. That's the thing about Big Sur; casual=fabulous.


We stayed at Treebones: an eco-tourism resort that offers upscale camping in posh, heated yurts. If you're going to Big Sur, STAY THERE. But call at least 6 months to a year in advance for a reservation. We definately want to return. It was so remote and yet incrediably comfortable and close to nature. They have their own extensive organic garden on site that participates in WWOOF and that provides all the vegetables for their on-site restaurant. After a day of hiking, we celebrated Eric's birthday dinner in the restaurant. Baby, I think 35 is the new 25 :)


We started with grilled artichokes from the garden seved with a zinfandel aioli. Then we shared the Moroccan Lamb Tagine for two, which could have easily been for four.


Then we opted for a trio of desserts: from right to left- a chocolate mousse, a key lime pie cheesecake cup, and this incredible, amazing, to-die-for thing called "Australian Sticky Date Pudding". It was so good that the next morning I begged the front desk attendant to call the old lady up the road who makes it for Treebones to ask her to send the recipe. Sticky-date-pudding-lady wasn't home. Does anyone know how to make this?


I also must note that we got a bottle of wine that was amazing and we learned why the California coast is an excellent environment for pinot noir. We LOVED this Poppy Pinot Noir.


Of course we also hit the Big Sur Bakery, but unfortunately we got there around 11:00 a.m. when their breakfast pastries were gone and their lunch options were just coming out. We shared a sweet onion and goat cheese foccacia which I really liked. However, sweet onion at 11:00 a.m. on what feels like a race track with a precarious drop off into the ocean? Eric couldn't take it. I'd like to give Big Sur Bakery another shot and perhaps have something soothing, such as a ginger scone!


A few tips if you travel to Big Sur: spring for a 4 wheel drive vehicle. You'll be happy for the extra weight through the twists and turns in the road. Go to Limekiln State Park for redwoods. Plan to spend money; there are only a few restaurants, places to grab food, and places to gas up. We also had our WORST meal of the trip here and were so angry that it cost us over $60 for something less than mediocre that would have cost $25 anywhere else. Also, Big Sur is a BIG place. We thought that we could stay at Treebones and go to Nepenthe for lunch one day. You can't. The drive is single-laned, twists and turns along the ocean. 30 miles takes 60 minutes or more. So stay in an area that is accessible to all the things you want to see.


Next: San Francisco!

Tuesday, September 7, 2010

Vote for Jam!


So, you may have noticed the little "featured publisher" button on the right side of my blog that appeared a few weeks ago. I joined a community called Foodbuzz that is basically Facebook for food nerds like me. We all "friend" each other and post photos of the things we make, discuss trends, techniques, tips, and basically bask in the warmth of a diverse group of people who are just like ourselves: obsessed with virtually breaking bread. Someone over there accepted my application to be a featured publisher and I'm pretty happy about that. More importantly, I've been meeting fabulous people. (Like Chef Dennis! He actually reads my blog! Check him out too at http://morethanamountfull.blogspot.com/).

The exciting news is that Foodbuzz is launching a blog competition. They are searching for the best new food blogger among 1,733 contestants at last count. The first competition post will be up on September 20th and the task is to create or make something that is uniquely "you". I'm putting on my thinking cap to decide what that might be. I already posted about pickles, so what is left that defines "me"? Meanwhile, get your index finger ready to vote for me with that little button on the top right corner. YOU will have a chance to weigh in!


OK, business over. Now on to fun.


I wish I'd saved this posting for that "uniquely you" assignment because my life can be defined by jam as much as pickles. However, until the age of 26 I would only eat one kind of jam: my mom's strawberry. The sad thing is that I've never tried to make it by myself. Why reinvent the wheel when my mom can do it better than me? I leave my annual supply of strawberry freezer jam to the pro until she says she won't do it anymore. (Deal, mom?) Oddly, strawberry jam on white bread reminds me of cauliflower because I used to eat it while in the back of the cauliflower trailor on wet harvest mornings. A strawberry jam sandwhich is best eaten in a big cardboard cauliflower box fort. You should try it sometime.


So, because I leave the best to mom, I decided to try entirely new flavors. Peaches are by far my favorite fruit, so that one was a given. I looked for an orchard where we could pick peaches and found Homestead Farm in Poolesville, MD. They also had blackberries in season. BINGO. I should note that this jam came at a high price: Eric's sanity. He didn't wash his arms off immedietly after the blackberry picking and got chiggers for 4 days. Poor guy. Let that be a lesson to you all!

An afternoon of picking gave us about 6 pounds blackberries and 15 pounds of peaches at a cost of about $42.00. It yielded 9 half pints of blackberry jam, 3 pints peach, 4 half pints peach and 3 pints of peach/blackberry mixed.

We used the reduced sugar SureJell recipe instead of full sugar which calls for SEVEN cups sugar for five cups of fruit. It's enough to make you never want to eat jam again. Even the reduced sugar SureJell was a bit too sweet for my taste, so next year I vow to find a way to use even significantly LESS sugar than this. Perhaps I can find a way to produce my own brand of pectin and market it to people who (a) don't like overly sweet jam and (b) refuse to use Splenda for the "no sugar" recipe. I'd rather use too much real sugar than one ounce of fake sugar.


Please assume that for all recipes we washed and rinsed the jars in scalding water and scalded the lids and rings.


We prepared the peaches by dropping them gently, one-by-one into boiling water for 1 minute, then an ice bath for 2 minutes. The skins slid right off and the stones separated from the flesh when cut in half.

So for both jams, it went like this:

5 whole cups blackberries (or 5 cups peaches) crushed
4 cups sugar
1 packet SureJell mixed with 1/4 cup of your measured sugar
Crush the berries/peaches into a 6-8 quart saucepan and let them slowly heat up and release their juices. Add the 1/4 cup sugar with the pectin. If you want to strain out a few seeds, go for it. But make sure you aren't taking away significant volume from the saucepan. Let it all come to a full rolling boil, stirring constantly. When the boil is constant, add the rest of the sugar and boil 1 minute more.

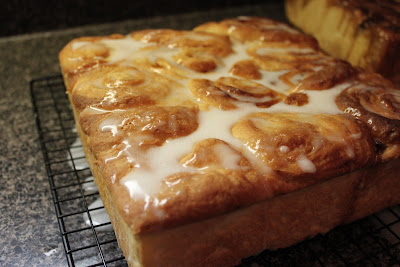
Ladle immedietly into jars with 1/8 inch space on top. Wipe the mouths of the jars clean and cover with the scalding hot lids and tighten with rings immedietly.


This is where it gets fun: my mom and grandma say that processing isn't necessary and that you can just flip your jars over for 5 minutes on their lids. When they flip back up, gravity will slowly pull the hot fruit down and seal the jar. I wanted to test this hypothesis so I didn't process the blackberry, but I did process the peach.


To process: lower the jars into boiling water that covers them 1-2 inches. You don't need a canner for this, people, so that can't be your excuse for not making jam. Just don't let the jars touch the bottom of the pot. I use a stainless steel trivet. The guys from The Bitten Word used this ingenious contraption: http://www.thebittenword.com/thebittenword/2010/08/canning-tomatoes-how-to-tomatoes-packed-in-water.html#more
Let them boil for 10 minutes in this manner before gently removing them to cool.


Surprise! ALL the jars sealed, including the ones that stood on their heads for 10 minutes. It certainly saved a step.
We also made a mixture of peach and blackberry that turned out to be my favorite of the whole bunch. Because the blackberries have a stronger texture, we just used one cup berries to four cups peaches.


Jam is time intensive, but I prefer to think of it as "love intensive". You've just got to give it a lot of love. Certainly when I can give jars of homemade organic sunshine away in the miserable winter, I hope people think of it as jarred love!

Thursday, September 2, 2010

Summer's almost over, but don't get crabby

August, 2010 marked my five year anniversary as a Maryland state resident. And this August provided to me various opportunities to complete my checklist of "things Maryland residents do". I saw a show at Ram's Head Tavern. I spent a crazy girls weekend in a beach house on the infamous Dewey Beach. Above all, I ate crabs.

Seth and Emily, also fellow New Yorkers have always been way ahead of me in their mid-atlantic assimilation. By now, they are old hats at the crab thing and Seth declares it his most favorite meal EVER. When asked why, he'll say its because it takes forever.....the crab eaters are forced to take their time with their meal. With their fingers occupied with crab-dismantling, there is ample time for beer and socializing. Eric and I were the lucky guests to Seth and Emily's first crab-christening of their new house in DC. I'm sure that a solid two weeks went by before the crab scent vacated their sparkling new home. Somehow, I don't think Seth was concerned.
I wish I could explain to you "how to eat a crab", but I can't. There is a method to the madness and a general process of tearing away the belly shell which Seth explained in a pre-dinner lesson, but after awhile your fingers take over and your mind mellows out in general crab-bliss. I honestly don't remember how I got all that crab meat into my mouth but I'm confident that if given the chance, I could easily do it again. Three days later Eric and I were still cleaning Old Bay seasoning out of our finger nails and scrubbing our hands with lemon.


That reminds me: I'm not a true Maryland resident until I keep a canister of Old Bay in my spice rack. There. That's my assignment for Labor Day weekend. Then I'll be official. Or maybe, I should finally go and get a Maryland license.